How to register for the Patient Portal
In order to use the Patient Portal to access your chart with Derick Dermatology, you will need to register an
account. To do this, you will need:
- Your name as you gave it when you first created a chart with Derick Dermatology (Keep in mind this may be different than what you go by due to nicknames or maiden names)
- Your date of birth
- Your zip code as it is recorded in your chart.
- Your unique Security Code, which is provided by Derick Dermatology staff via email (if you need your Security Code reissued, please contact us at (866) 337-4251, option 1, and we will be happy to assist.)
For both registration and post-registration access, the Patient Portal website can be accessed via the ‘Patient Portal’ buttons above.
1. Select the Patient Registration link above.
This will open the registration page in a new tab, so that you can continue to reference these instructions.
Please note: all fields must specifically match the information that Derick Dermatology has on file.
2. You will be asked to create a unique username. We suggest using an email address for your username. The username field will indicate the username’s availability with a green check or a red X, as seen below.
3. When you have selected a username that passes the availability check, continue on to create your password.
In order to keep your account secure, your password must meet complexity requirements. These are as follows:
- At least eight characters in length
- Three out of four of the following:
i. Uppercase letters
ii. Lowercase letters
iii. Numbers
iv. Special characters, limited to: ~!@#$%^&*;?.+_
Type your chosen password into both the Password and Confirm Password fields.
Please note that if the passwords do not match, you will be alerted to this when you click the Create Account button at the end of the registration process. If you receive this error, simply retype your passwords to match.
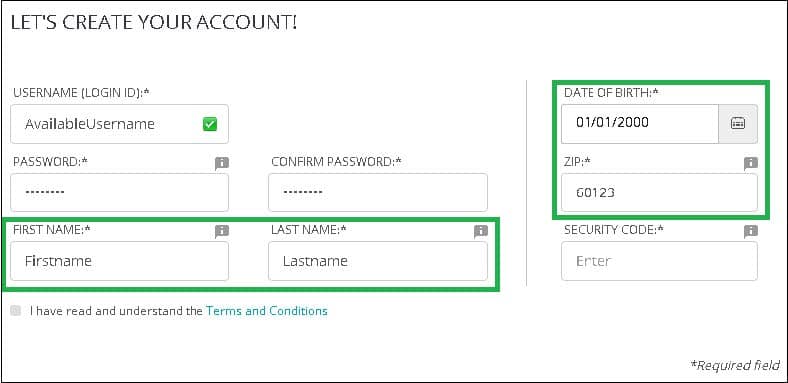
4. Next, fill in the First Name, Last Name, Date of Birth, and Zip fields with the information that matches your chart at Derick Dermatology.
– If any of your information needs to be updated, please call our Scheduling department at (866) 337-4251, option 1 and we will assist updating your chart.
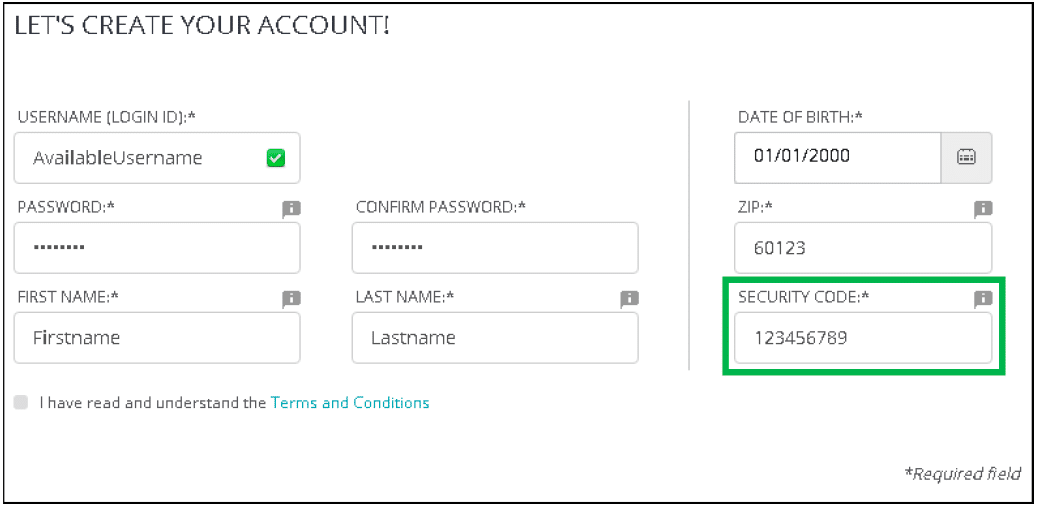
5. Once you have entered your personal information, you will need to enter your Security Code. This will have been provided in an email. If you have lost this number, please call our Scheduling department at (866) 337-4251, option 1 and we will help you recover it.
6. Next, fill the checkbox indicating that you accept the Terms and Conditions which can be found by clicking the link “Terms and Conditions”.
7. Finally, click the “Create Account” button. This will perform a check to make sure all the information provided matches the information in your chart. If any of your information does not match, you will be prompted to review the provided information and correct it.
8. Upon successful completion of this page, you will be taken back to the login page. Here you will login with the username and password you provided earlier.
9. Upon successful login, you will be prompted to answer a few security questions in case you ever forget your password. Simply choose the questions you prefer and enter the answers.
– Please note: although the same questions appear to be options for all 3 fields, you must select a unique question for each field.
10. Once you have finished the security questions, you will be moved to the Medical Record selection screen.
– Upon registration, there is just the one registered medical record, but you may add minor children and others for whom you have authorization. It is here that you will choose the record that you wish to view.
If you have any issues with the above steps, please feel free to call our Scheduling department, at (866) 337-4251, option 1, and we will be happy to assist.


